


Set up for My Frame Gallery is a simple process that practically anyone can do. You don't need a strong technology background to create a customized virtual frame board!
The set-up process consists of four sections:
- Settings
- Add Frames
- Review/Edit
- Publish
In this post, we're going to take you through step 1, the Settings page.
Login and Navigate to My Frame Gallery Settings
To begin, login to Frames Data Online with your username and password.
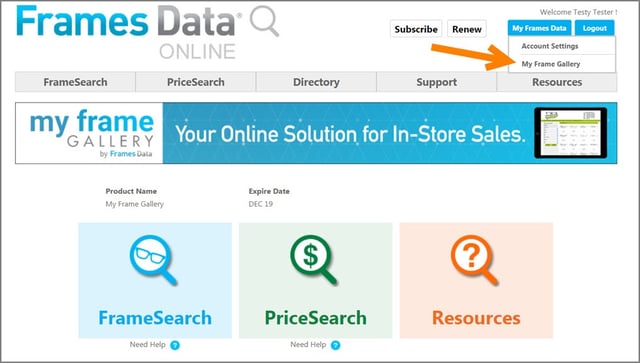
From there, go to the My Frame Gallery landing page. To find it:
- Click on the My Frames Data button in the upper right hand corner of your screen
- Then select My Frame Gallery from the drop down menu.
You can also click on the My Frame Gallery banner that appears as soon as you login.
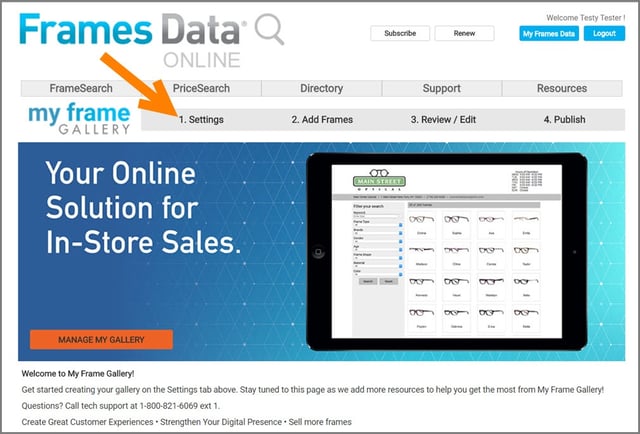
You should now be on the My Frame Gallery landing page.
- Click on the Manage My Gallery button or the Settings tab in the My Frame Gallery navigation bar. That will take you to the first step of the 4-step process: the Settings page.
The Settings Page
You'll notice that the Settings page has 6 individual sections which will walk you through customization of your Gallery. This page covers everything except the frames you carry.
1. Public URL
At the top of the Settings page, you will see the “Public URL” section. Frames Data will automatically generate a webpage, or URL, for your gallery. This is the web address where your Gallery will live! It will be based on the name of your company, and you can see that URL here.
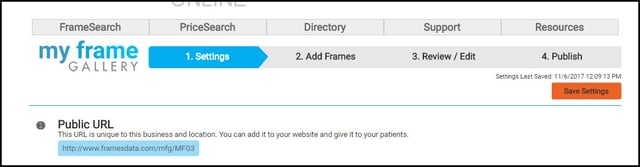
At this point, there’s nothing at that address yet; it will be live only after you’ve saved your settings on this page.
You are welcome to keep this URL as is, or you can change it to something you prefer.
However, be aware that you can only change your URL once. After you change it that one time, it will be your permanent URL, so make sure that it’s something that you truly want and is appropriate for your company.
Also, be aware that once you’ve saved your settings the first time, the public URL option will not accept changes.
- Review the Public URL that has been automatically generated for your Gallery
- Edit it if necessary
- Remember, it can only be changed once.
Whenever you see the words “SEE MORE”, for instance under “Update Retail information”, you’ll be able to retrieve additional information about that section by clicking on “SEE MORE”. So if you aren’t sure how to use something, look for “SEE MORE” to learn more about it.

2. Update Retail Information
Now, under the UPDATE RETAIL INFORMATION header, you’ll review your store’s address and contact information and update it if necessary. This information will display on your gallery, and it should be the street address where your customers will come to visit you.
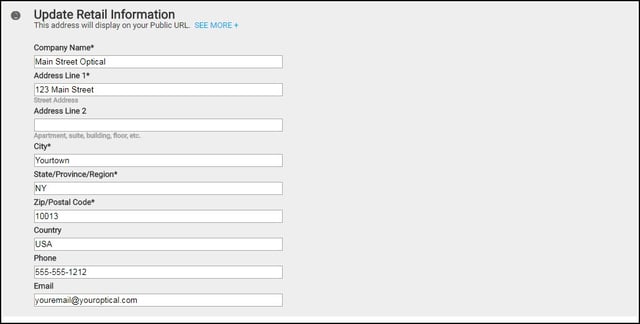
- This information will be populated from your subscription with Frames Data, so you won’t need to re-enter it.
- Any corrections you make in this section will only change what is displayed on your Gallery page; it will not overwrite anything on your actual Frames Data subscription account.
3. Store Hours

Next, use the drop down menus to edit your daily store hours.
If you choose not to show your hours, you have the option to hide them:
- Select your hours of operations using the drop down menus.
- Check "Closed" for any days you are not open.
- Check the "Do NOT display store hours" check box to hide your hours.
4. Your Logo
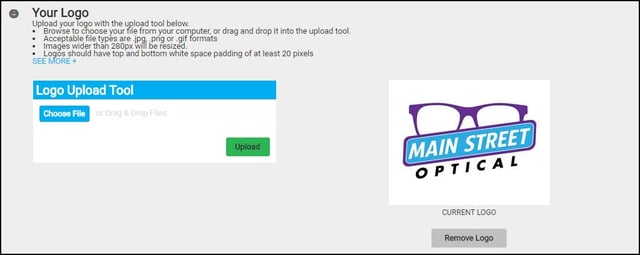
Next you'll upload your logo, which will be located on the top left of your Gallery. You can browse to find your logo on your computer, or simply drag and drop it into the image uploader.
About logos:
- Your logo needs to be in either a .jpg, .png or .gif file format.
- Images wider than 280px will be automatically re-sized to fit the allotted space.
- Logos should have top and bottom white space padding of at least 20 pixels
5. Accent Colors
Next, you’ll choose accent colors that will make your page look great and match your brand aesthetic. You’ll need to choose an accent bar color, as well as the color for the type (in other words, the actual words that appear on the page).
- Choose an Accent Bar color
- Choose a Type Color
- Your choices will display as a preview in the color bar in the middle of this section.
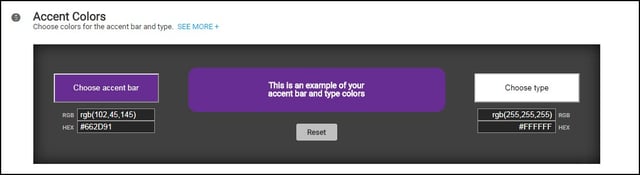
Here’s a helpful tip when deciding on colors. You want your page to be professional and cohesive, so try to pick colors that go well with your logo.
For example, if your logo is blue you may try to match that blue in the accent bar. An even bolder choice is to select a complementary color to your logo. So if your logo is blue, choose an orange, if your logo is purple, choose something in the yellow family.
However, whichever colors you choose, you want to go with either a light color or a dark color. That’s because your type – your address and contact details -- will go on top of this color and it needs to stand out.
You want the text to be easily seen and legible. So if your accent bar is a dark color, we suggest that your type choice be white, and if your accent bar is a light color your text should be black or a dark gray.
Remember:
- Choose an accent color that matches or contrasts to your logo
- Stick to either very light or very dark colors to maximize contrast and increase legibility.
- Choose a font color that will provide the strongest contrast to the accent color, preferably white, black or very dark gray.
6. Footer Message
The last thing on the page is the Footer Message, which appears at the bottom of your gallery page.
This is your opportunity to add a special message to your customers. Simply enter your message into the Footer Message text field.
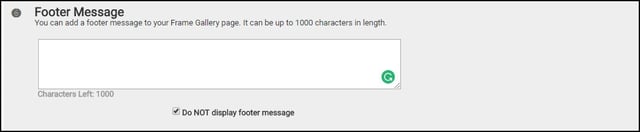
Here are some examples of Footer Messages you might consider:
- See a frame you like? Call to set up an appointment.
- Remember to use your flex spending!
- The best frame selection in town! Come see us!
You could also opt to not have a message at all by checking the "Do NOT display footer message" check box.
Save Settings
Now this next part is very important: Always click save settings when you are done with a page! If you don’t, your changes will not be saved.

If you are making changes on this page to a gallery that already exists, remember that you will need to “PUBLISH” these changes before they will appear on the gallery.

We’ll be going over how to use the “Publish” page in a future post.
Stay tuned for our “Part Two” post which will cover how to find and add frames to your gallery!


Leave a comment