New and improved! Automatic Brand Updates program keeps your online gallery current for you.
Do you want your online frame gallery to reflect the brands you carry, but also minimize the amount of time and attention required to keep it updated?
Weekly Automatic Brand Updates helps you do that. And now, we've made it even easier for you to enroll in and manage your Auto Update. Here are the details:
What is Auto Brand Update?
The My Frame Gallery Automatic Brand Update program makes set-up easy and maintenance work nearly non-existent. Instead of adding frames one by one to maintain your gallery, it enables you to select entire brands or collections. Then, going forward, your gallery will be updated once per week to reflect all active styles in your selected brands/collection.
What is the benefit?
It's a huge time-saver and it results in a perpetually up-to-date Gallery.
This program allows you to forgo adding new frames style-by-style as they are made available. We'll do the work for you! Once you choose your brands, they’re always updated without your intervention.
What has changed?
The process to sign up for the program is easier than ever. If you're a My Frame Gallery subscriber, you no longer have to reach out to our support team to enroll in and use it. You can sign up and manage which lines you decide to display on your own. And now, if you add a new line, or stop carrying one, simply login and uncheck a box. Keep reading for details on how to do it.
We also enabled the ability to choose on the collection level. Previously, you could only choose by brand.
Things to consider before enrolling
Any frames that don't currently have an image will be automatically eliminated during the update, helping your Gallery maintain a consistent appearance for a better customer experience. If we are able to add the image later, the style will be included in your next update.
Additionally, the Automatic Brand Update program is only at the brand or collection level, rather than the style level. Any line that is selected will include all frames from that line, potentially including frames you may not have in-store. If you prefer to match exactly what is in your inventory, we recommend that you stick with the Add Individual Frames by Frame Search option.
Another thing to bear in mind: it’s one or the other. You can’t add individual frames if you are using auto update. If you sign up for the program and then change your mind, please contact techsupport@framesdata.com and we'll help you switch back.
How do I enroll?
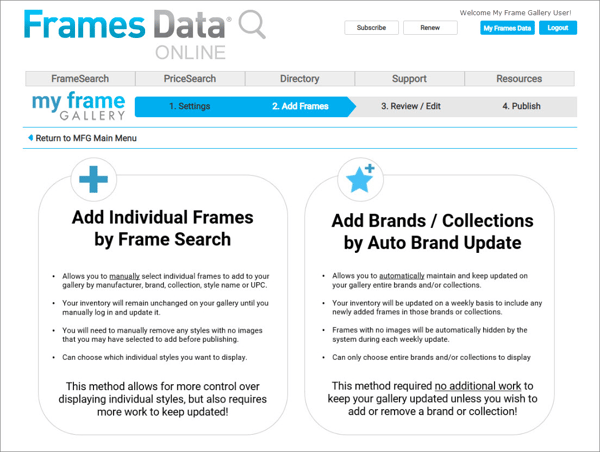
Simply click the Add Brands / Collections by Auto Brand Update option from the Add Frames section of your My Frame Gallery set up. You can also still choose to Add Individual Frames by Frame Search.
Note: If you're currently enrolled in auto updates, you won't see the page pictured below. If you'd like to switch from auto brand updates to adding frames individually, just let our tech support team know.
While you're setting up your gallery, you can play around and switch between the two options to see which you prefer. Once you publish, however, your gallery will be updated based on the last option you selected before saving your changes.
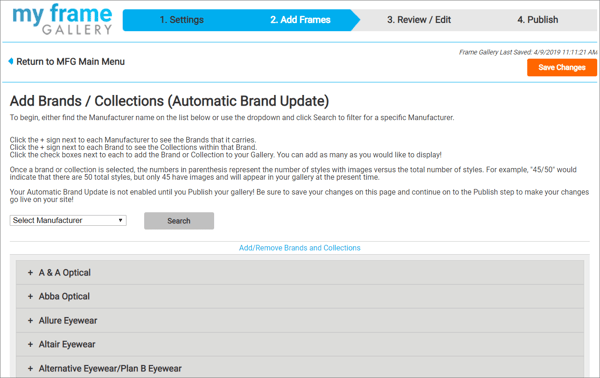
Once you click the Add Brands / Collections by Auto Brand Update, you will see the following page.
Select a manufacturer and click Search, or scroll down through the alphabetical list. Manufacturers who do not yet have any products in your gallery will appear in gray.
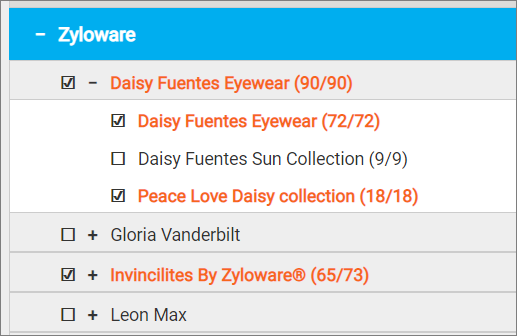
Click the + to the left of the manufacturer. This will give you the option to select any of its brands.
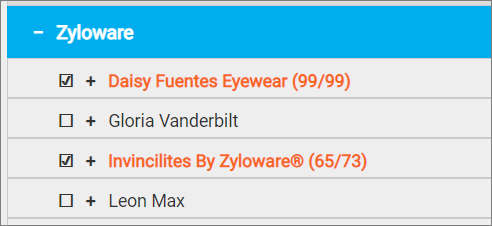
Once you select a brand, its text will turn orange. A manufacturer with any brand in your gallery will turn blue.
If you carry most collections in a brand, but not all, you can easily deselect collections you want to remove.
If you want to de-select a line, simply uncheck its box.
Once you have selected all the lines you wish to have added to your gallery, click the orange Save Changes button on the top right. Don't worry, these updates aren't live yet!
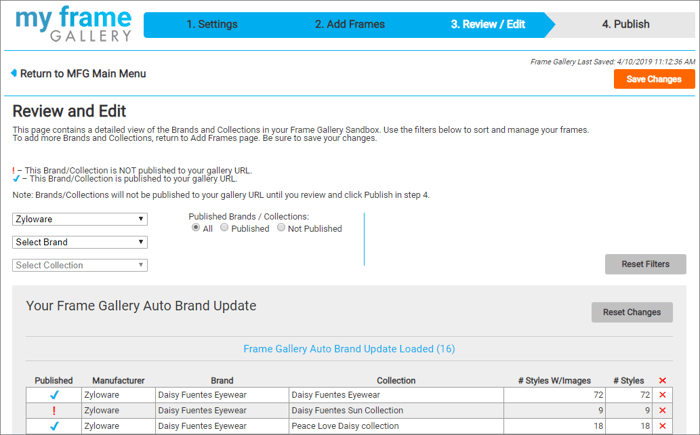
You can still click 3. Review / Edit to double check your changes, and remove any lines that you don't want to appear on your gallery.
Not sure whether a specific line is already on your Gallery? Check the left-hand column.
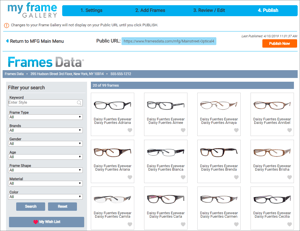
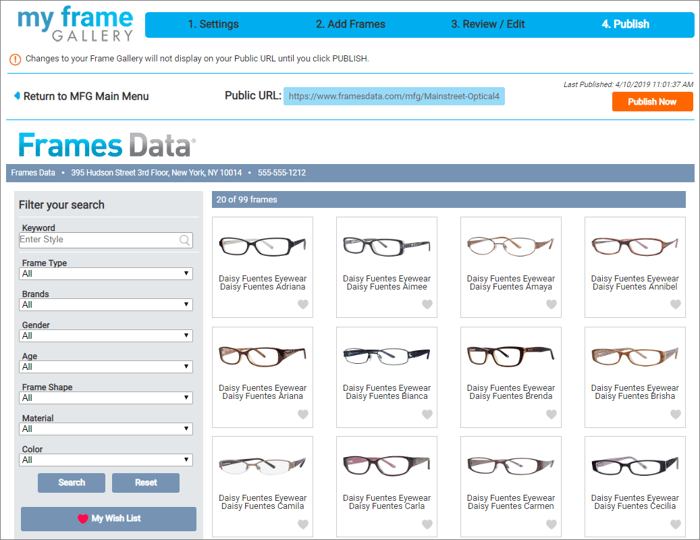
Once you are ready for your patients to start browsing your updated gallery, click 4. Publish. You'll get a quick preview of how your gallery will look once it's live.
You can still click back through the previous three sections and make changes again (just don't forget to save them on each page!).
When you're happy with your updates, click the Publish Now. To go directly to your updated frame board, click the Public URL.
Enjoy having Frames Data maintain your Frame Gallery for you!




.png)

Leave a comment