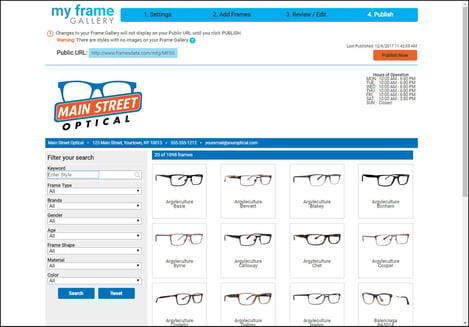
The final step of this My Frame Gallery how-to series is the "Publish" tab.
Need to review the earlier steps? Here are the two previous posts in this series:
- My Frame Gallery Set-Up Part 1: Customizing Your Gallery
- My Frame Gallery Set-Up Part 2: Add & Edit Your Frame Selections
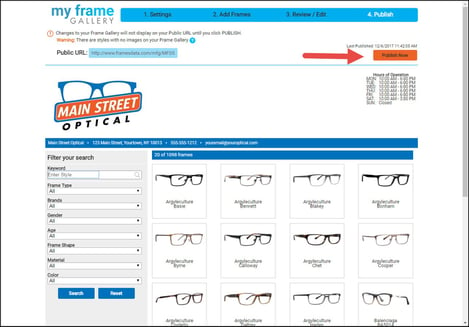
The "Publish" tab generates a preview of what your gallery will look like. This is your chance to double check your work before making your gallery live for the world to see.
Take some time now to do a final proofing of the gallery: confirm that your hours of operation are correct, that your logo appears to your liking, and that there are no typos or misspellings in your address.

Although your gallery is saved, it is not live yet. Therefore, if you need to add or delete frames, edit your store hours, or change your color scheme, you can click on the previous tabs and make changes.
Once you have taken a final look and are satisfied that your gallery is ready, press the "Publish Now" button.

Congratulations! Your gallery has been fully published to your Public URL, and you can begin to point customers and website visitors to it.
If you have any additional questions please call our technical support line at 1-800-821-6069 ext. 1, or email techsupport@framesdata.com.


.png)

![Triple your engagement with this one simple [appointment reminder] trick!](https://blog.framesdata.com/hubfs/aloha%20phones%20(2).png)
Leave a comment